For years we have processed our own game, spending late nights cutting, grinding wrapping, and labeling. However, over the last few years, I have come to prefer vacuum-sealing my game over paper wrap.
The main reason is the meat gets freezer burned less easily and the meat, therefore, tends to keep longer. The process is quick and convenient and I typically take care of my game immediately after hunting or fishing.
That said, there are correct and incorrect ways of vacuum sealing game. Of course, I also learned this the hard way.
Let’s face it, there is nothing more heartbreaking than finding ruined meat in our freezers. Vacuum sealers are available in a wide variety of price points, and the sealer you choose should be based on your budget.
I am going to be honest, I have purchased very high-end sealers that have broken after a year or so of use.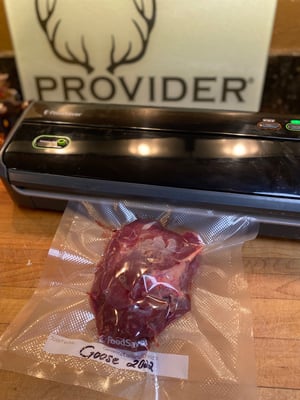
Now I personally use the Food Saver brand and choose one of the most economical models. Oddly, this particular one has lasted me three years so far and is showing no signs of stopping.
Ask around and choose based on your own personal needs. Vacuum seal bags come in a variety of options. Some can be manually cut to accommodate any size of meat. Some come in pre-determined sizes like a quart or gallon.
Since it is just my husband and me at home now, I consistently opt for the quart-size bags as I like the convenience of not cutting the bags and the quart sizes are more than adequate for our meat portions.
When determining your meat portions, try to take into account how much of that particular meat or fish you typically use in your meals.
I have found overloading my bags leads to waste, under loading is just a dinnertime disappointment.
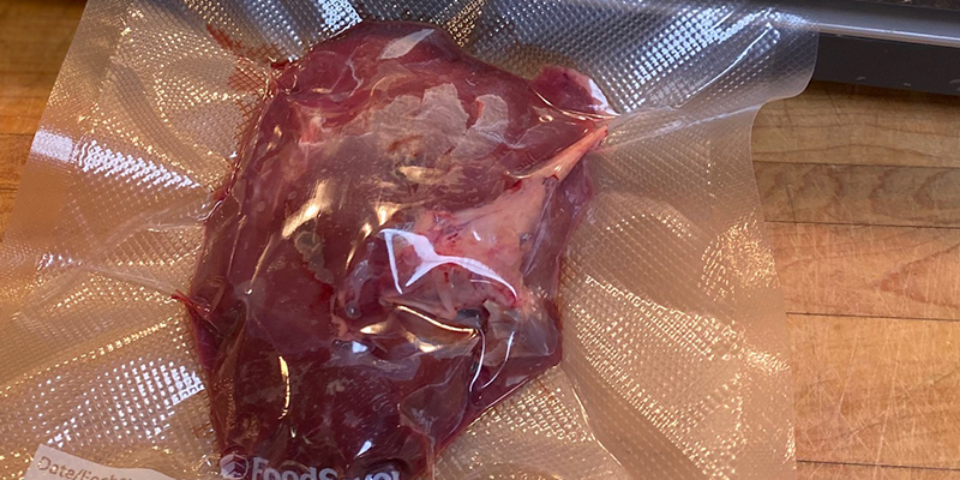
Wash and clean your game when you are ready to seal and freeze. I typically rinse and pick my game and set it in a dish rack to drain in the sink.
I personally don’t spend too much time at this juncture working on detailed trimming as I simply do that when I thaw and cook the meat. It allows me to process as much meat as possible in a short time.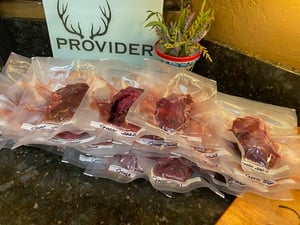
Once the meat is drained, I take 2 clean dishtowels that I set aside for this purpose to dry to meat. If meat is wet when it goes in the bags, the liquid is pulled out as the sealer pulls the air from the bag.
The result is liquid in the heat-seal line which either kills the seal or does not allow the vacuum/seal process to finish. I thoroughly dry the meat just by pressing the meat between the towels. You can also use paper towels for this process but I have found it to be somewhat wasteful.
Once dried, place the meat in the bag, vacuum seal, and label. Ensure the heat seal looks sturdy and also make sure no air leaks back in the package.
If air is back in the package (even just a little) you will indeed get freezer burn at some point.
I rotate my older meat to the front or top of the freezer, placing the newer meat below.
I have been very pleased with the results from vacuum sealing. I have pulled meat from the freezer that was five years old and presented with literally no freezer burn. I highly recommend it!
About the Author